💳 In-app-payment
1. How Stripe Subscription Works
When a user initiates a checkout session, Stripe creates a customer and links their email to their account. The user completes the payment on Stripe’s secure page, and once processed, a webhook updates their subscription status in Firestore via Firebase Cloud Functions.
2. Set Up Your Stripe Subscription
-
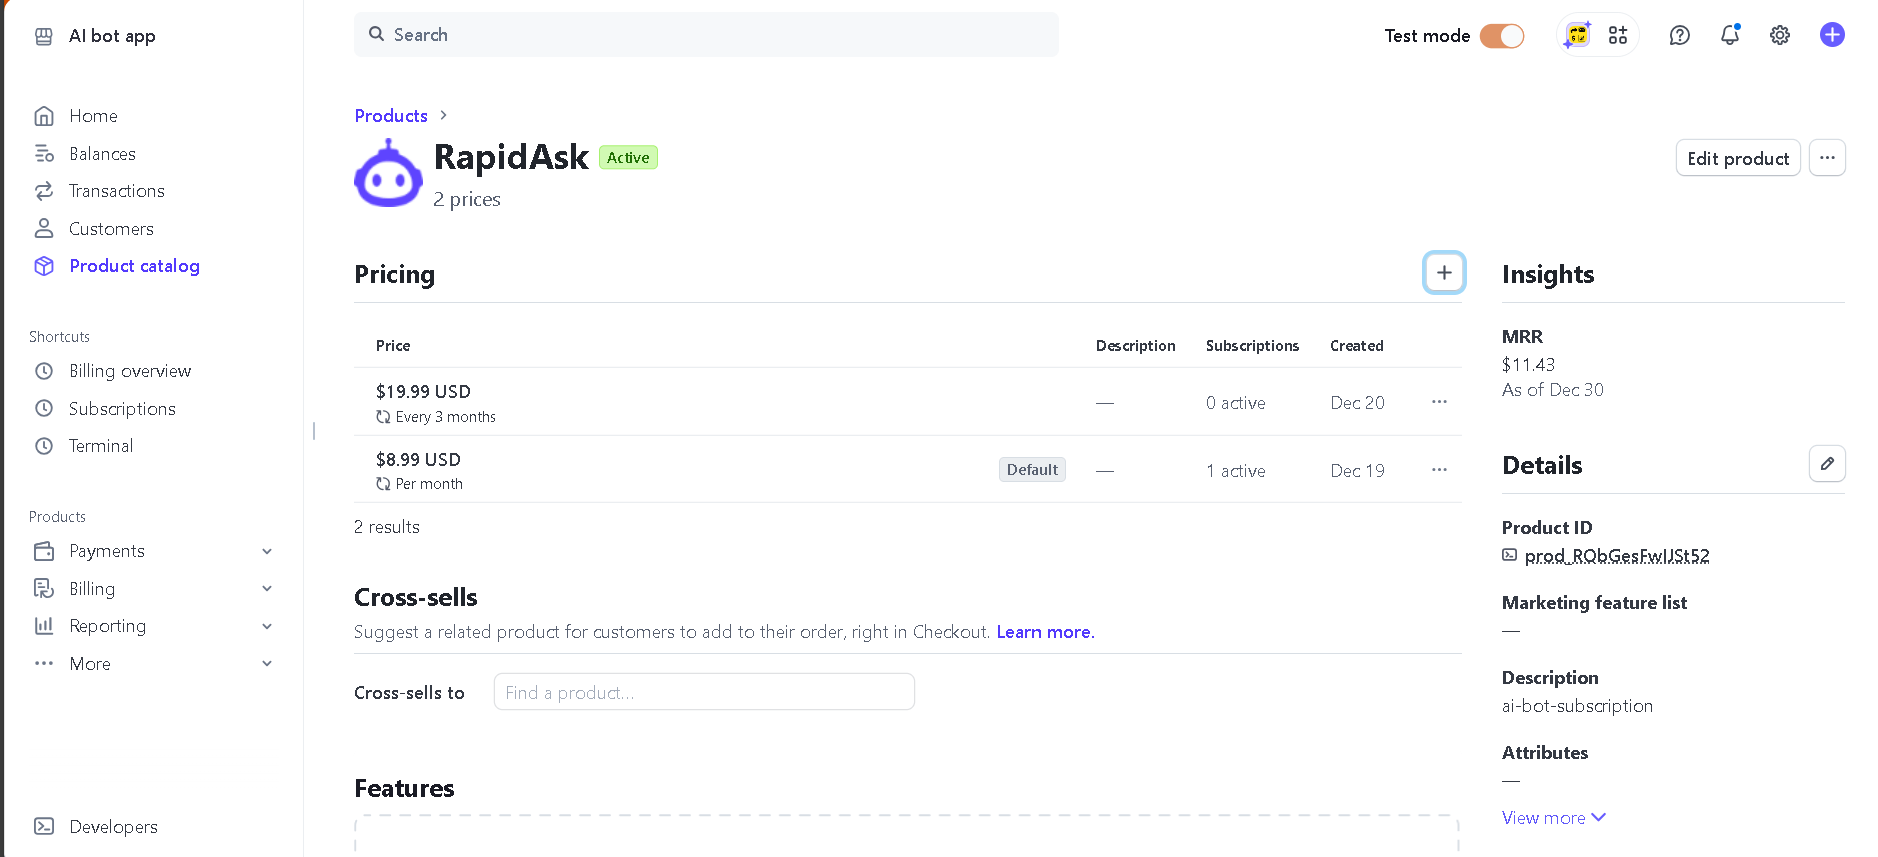
In your Stripe dashboard: Create new Product:
-
Go to
Productsin the sidebar and clickAdd product. -
Fill out the necessary details, such as the name of the product and description.
-
Under
Pricing, create the subscription pricing plans. For example, RapidAsk uses two pricing models: $8.99 per month / $19.99 per 3 months -
Click
Saveto create the product and get the product ID and price ID for your plans.(you will be able to add more pricings after saving)
-
-
Connect your product ID with FlutterFlow actions
- Navigate to the
SubscriptionPagein FlutterFlow. - For each subscription option (e.g., monthly, 3 months), go to the
onTapaction and set the appropriatePrice ID(e.g.,price_1QXk3w*******). You can find these IDs in your Stripe Dashboard under the product’s pricing section. - ensure it's the same
Price IDto control UI elements, like toggling thecontainer_border(ui widgets) and showing acheckmark_iconto indicate the selected option.
Make sure each pricing option is properly linked to the corresponding price ID, as this determines which plan the user selects during checkout.
- Navigate to the
-
Set Up the Checkout Session API Request
- In your FlutterFlow app, set up the Checkout Session API request. This request will initiate the Stripe checkout session when a user selects a subscription option.
- The API request should pass the appropriate price ID, as well as other necessary parameters such as the user's email and the success and cancel URLs.
Make sure to set up these URLs correctly:
- Success URL: This URL is where users are redirected after completing the payment successfully. You should create a "Thank You" or confirmation page in your app and use its URL here.
- Cancel URL: This URL is where users are sent if they cancel the payment. Make sure to create a cancellation page in your app and use its URL here.
-
Handle Webhooks in Firebase Cloud Functions
- After the user makes a payment, Stripe will send a webhook to your Firebase Cloud Function to notify you of the payment status.
- All the necessary functions to handle webhooks are already included in the FCF section of the FlutterFlow template you received. These functions will update the
subscriptionStatusfield in Firestore based on the payment events (such asactive,canceled,failed, etc.).
3. After Payment
-
Successful Payment: After a successful payment, the Firebase Cloud Function listens for the
checkout.session.completedevent and updates thesubscriptionStatusfield in Firestore to reflect the new subscription status (e.g.,active). -
Failed Payment: If a payment fails, the Cloud Function listens for the
invoice.payment_failedevent and updates thesubscriptionStatustofailed. You can handle failed payments however you prefer, such as alerting the user or suspending their subscription. -
Subscription Cancellation: If a user cancels their subscription, the relevant webhook event (
customer.subscription.deleted) will be triggered, and the Cloud Function will update thesubscriptionStatustocanceled.
4. Testing Your Integration
Before going live, it’s crucial to test the Stripe integration:
-
Use Stripe's Test Mode: In the Stripe Dashboard, make sure you’re in Test Mode when testing your payments and webhooks.
-
Stripe Test Cards: Use Stripe’s test card numbers to simulate successful and failed payments. For example:
- Successful payment:
4242 4242 4242 4242(Visa) - Failed payment:
4000 0000 0000 9995(Card declined)
- Successful payment:
-
Webhook Testing: Use the Stripe CLI or Dashboard to trigger webhook events (e.g., payment success, payment failure) and make sure the Firebase Cloud Function handles them correctly.